Did you know that compromised credentials served as the initial access vector in 22% of analysed breaches? Protecting your Linux infrastructure requires more than just standard SSH keys; you need a secondary layer of verification to neutralise the threat of stolen credentials.
Why SSH Keys Are Not Enough
While SSH keys are significantly more secure than simple passwords, they are not infallible. Private keys can be exfiltrated from workstations, and passphrases can be logged or brute-forced. Research indicates that nearly half of all breaches involve the use of stolen credentials, making multi-factor authentication a critical requirement for any server exposed to a network.
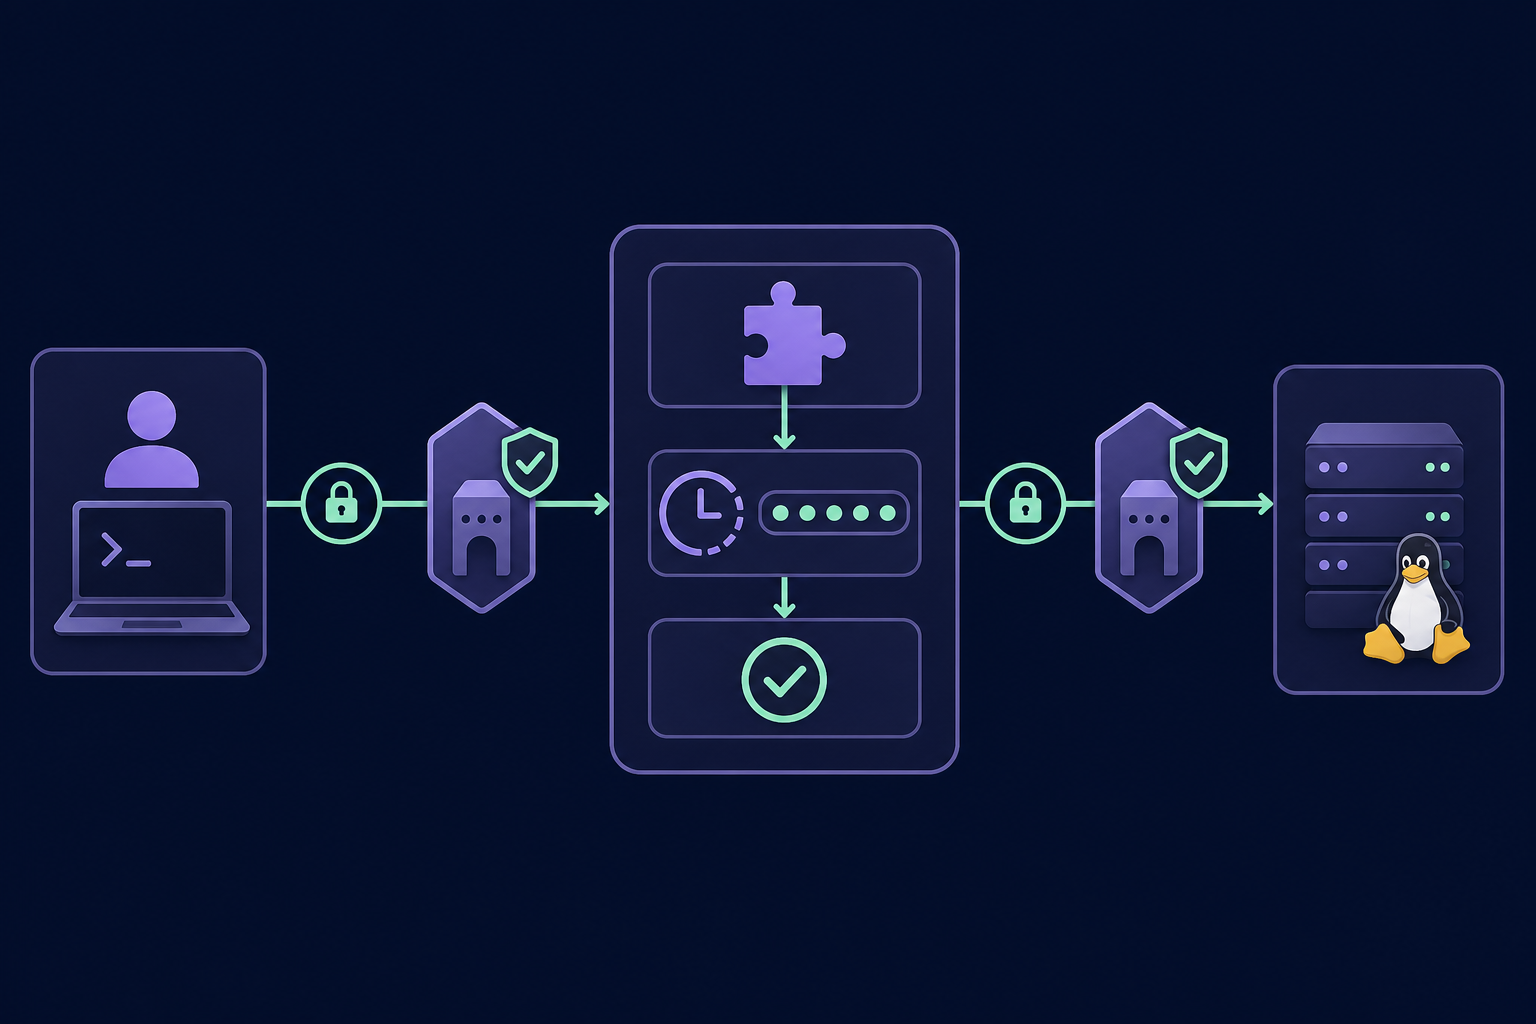
Implementing MFA for SSH ensures that even if an attacker obtains both a password and a private key, they still lack the ephemeral one-time password required to grant access. This approach aligns with zero trust MFA principles where you never trust and always verify every connection attempt. By requiring more than one factor, you move beyond the limitations of basic 2FA to create a more resilient identity perimeter.
Setting Up MFA for SSH on Linux
The most common method for implementing MFA on Linux involves using the Pluggable Authentication Module (PAM) framework. By integrating a TOTP generator, you can force SSH to request a time-based code during the login process.
Install the Google Authenticator PAM Module
Most modern Linux distributions provide a dedicated package for the Google Authenticator PAM module. You will need to install this package to provide the necessary library for SSH to interact with your authentication tokens.
- On Ubuntu or Debian:
sudo apt install libpam-google-authenticator - On RHEL or CentOS:
sudo dnf install google-authenticator
Configure the PAM Daemon
You must instruct the PAM system to use the authenticator module specifically for SSH sessions. This is handled by modifying the SSH-specific PAM configuration file located at /etc/pam.d/sshd.
Open this file with your preferred text editor and add the following line:
auth required pam_google_authenticator.so
If you are in the middle of a migration and need to allow users who have not yet configured their tokens to log in, you can append nullok to the end of the line. However, to maintain strict security and meet mfa compliance for IT teams, you should eventually remove this flag to ensure MFA is mandatory for everyone.
Update the SSH Configuration
Next, you must modify the main SSH daemon configuration at /etc/ssh/sshd_config to support the challenge-response mechanism required for interactive prompts. You need to ensure the following directives are correctly set:
- KbdInteractiveAuthentication: Set this to
yes. - UsePAM: Ensure this is set to
yes. - AuthenticationMethods: Add
publickey,keyboard-interactive:pamto require both an SSH key and an MFA code.
After making these changes, always test your configuration with sshd -t before restarting the service to avoid locking yourself out of the server.
Initialise the MFA Secret
Each user on the system must run the configuration utility to generate their unique secret key. Running the google-authenticator command will initiate a series of prompts. You should answer y to use time-based tokens, which ensures you are using the more secure TOTP standard rather than counter-based codes.
The utility will display a QR code and several emergency scratch codes. While it is common to scan these into a phone, professional environments should store these secrets in a centralised mfa management platform to ensure the seeds are protected and available for recovery.
Operational Risks of Personal Device MFA
For IT teams and DevOps professionals, relying on personal smartphones to store server MFA codes creates significant bottlenecks. If a senior engineer is unavailable or leaves the company, the MFA offboarding checklist becomes a security nightmare. Secrets stored on personal devices cannot be easily revoked, leading to lingering access risks or the high cost of manual credential rotation.
Compliance frameworks like SOC 2 and ISO 27001 require that privileged access is not only protected by MFA but also properly logged and auditable. When authentication codes are scattered across individual devices, you lose the centralised visibility required for enterprise governance and incident response.
Managing SSH Secrets at Scale
To maintain the principle of least privilege, your team should avoid fragmented authentication. Instead of tying server access to individual phones, professional teams use a shared OTP vault. Centralising your secrets in a dedicated vault provides several critical advantages for infrastructure management:
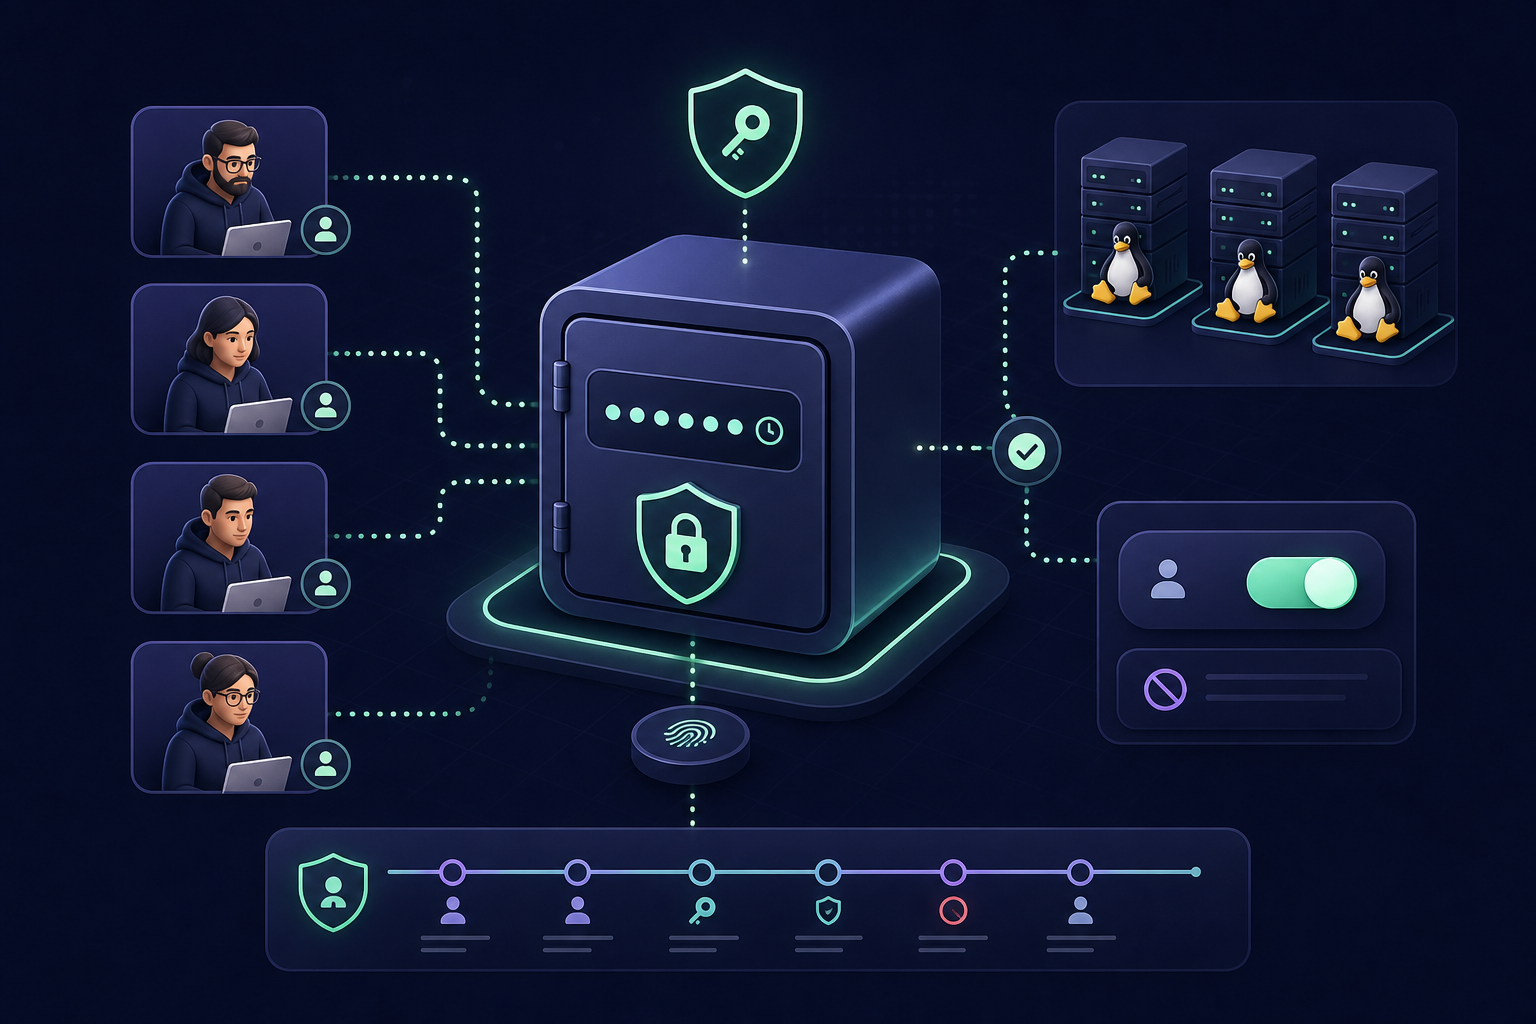
- Instant Revocation: You can remove a user's access to all server MFA codes in seconds when they change roles or offboard.
- Audit Logging: You can track exactly who accessed which MFA code and when, providing a clear trail for compliance auditors.
- Team Continuity: You prevent "break-glass" scenarios and lockouts caused by lost hardware or employee turnover.
Implementing MFA for SSH access is a fundamental step in hardening your Linux environment against modern credential-based attacks. By moving beyond personal devices and adopting mfa for teams, you ensure your infrastructure remains secure, compliant, and accessible to the right people at the right time.
Protect your critical infrastructure by centralising your authentication secrets – start your 14-day free trial of Gatera today.